With the changes of Sharepoint Online Public Websites, that where my home site has resided last 2 years, companies in Office 365 world, have to migrate Public Websites till 9th March 2017, more information here – https://support.microsoft.com/en-us/kb/3027254 .
This article describes how to Migrate a Public Website that resides on Sharepoint Online to a new solution.
Microsoft have now 2 partners. Customers will have the option of subscribing to third-party solutions for public website functionality, more information here – https://support.office.com/en-us/article/Website-hosting-partners-for-Office-365-47b10b76-315a-45a6-ad89-93ae2834d19d?ui=en-US&rs=en-US&ad=US .
If you have and Azure subscription and you consider to move to a new type of website and move all content to a new solution you can move your site to Azure.
The solution that I have created is based to archive the best experience to the end user and to reach the objective to migrate all content.
The problem:
Public Sharepoint Website will be discontinued in 2017, and have to migrate to a third-party solution.
The solution:
Website migrated with all content to WordPress on Azure built with SQL Database
What where the steps to archive this solution like this?
- From Sharepoint Online
- Create the Solution
- Configure WordPress
- Import Blog Posts
First of all, we have to export all content from Public website like pages, photos, etc. To best archive the blog posts we need to export content in a format that we can import to WordPress.
This article show’s the process to import all Posts to WordPress from Sharepoint.
1 – From Sharepoint Online
This section will show how to export blog posts to in future import to WordPress
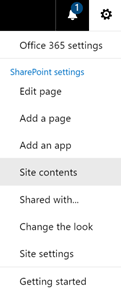
- Logon to your Office 365 Public website with Global Admin credentials
-
Go to site Contents
-
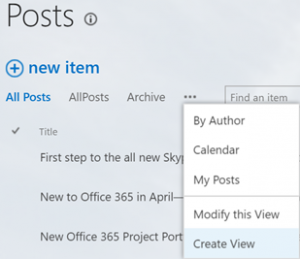
Select Posts
-
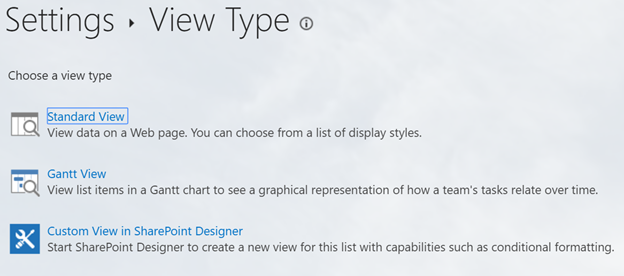
Select Create a View
-
Select Standard View
-
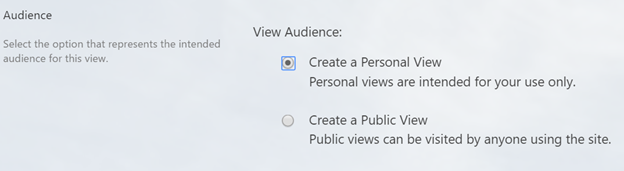
Give a name for Example “AllPosts” and change the “View Audience” to “Create a Personal View”
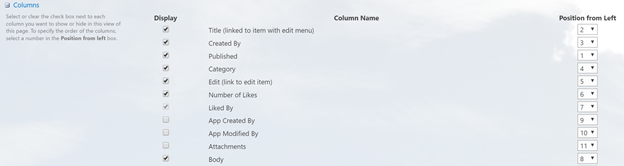
- Select the Column like:
| Display | Column Name | Position from Left |
| X | Published |
1 |
| X | Title (linked to item with edit menu) |
2 |
| X | Created By |
3 |
| X | Category |
4 |
| X | Edit (link to edit item) |
5 |
| X | Number of Likes |
6 |
| X | Liked By |
7 |
| X | Body |
8 |
-
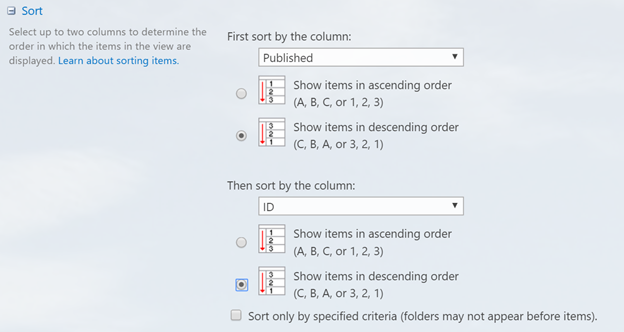
Select Sort order like the image below
-
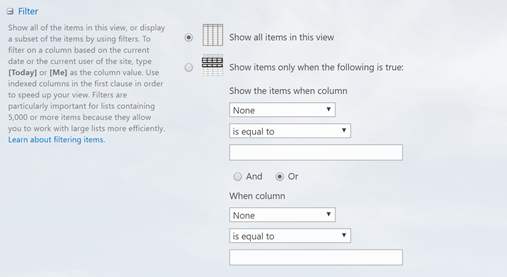
In the Filter do not change the filter, make sure you have selected “Show all items in this view”
-
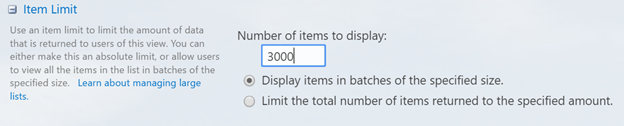
Change the item limit to a number higher than your total blog posts, like
- And finally click OK
-
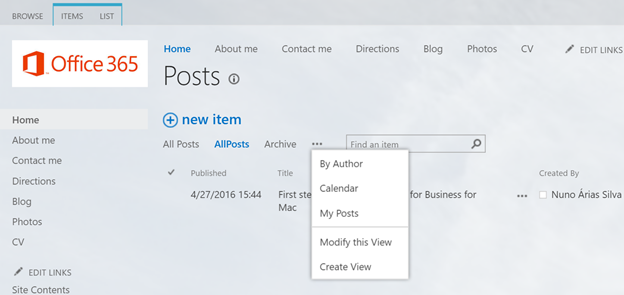
After created the view go back to Site Contents an go to posts and select “Settings”
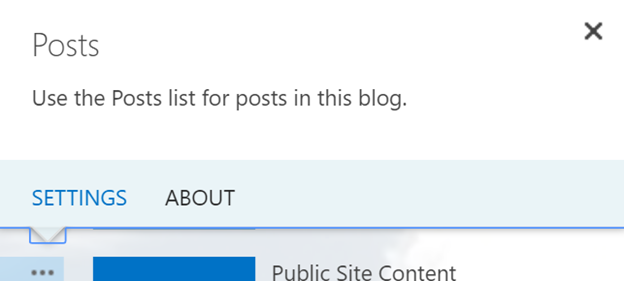
-
Select RSS Settings
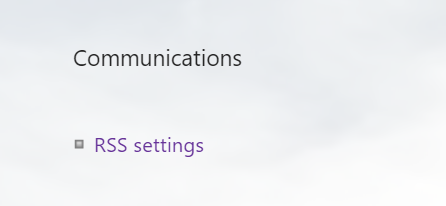
-
Then Select Yes in “Allow RSS for this list” and fill your Title and Description
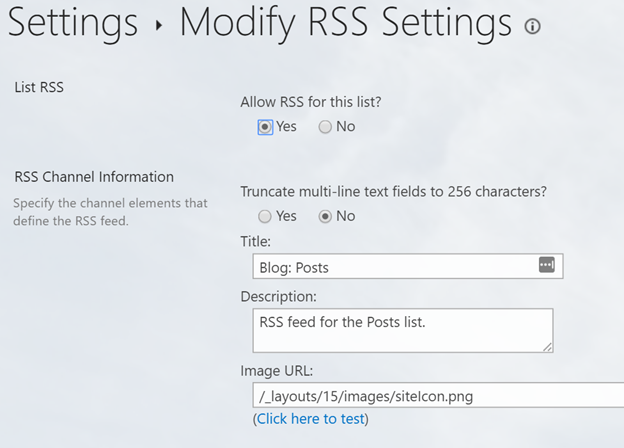
-
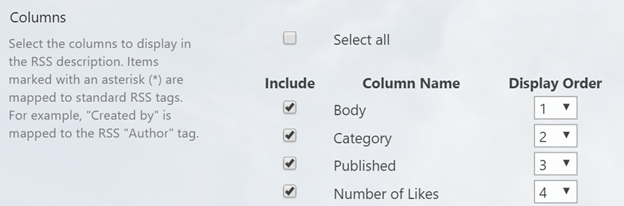
Select the Columns – Body, Category, Published and Number of Likes like the image below
-
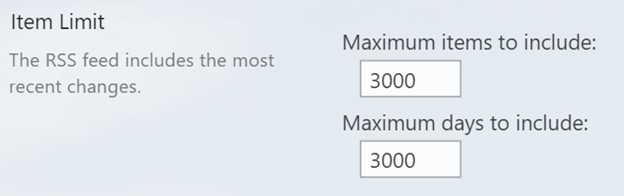
Fill the Item Limit with values that have in one RSS Feed your total Blog Post like the image below.
- Then Select Ok
-
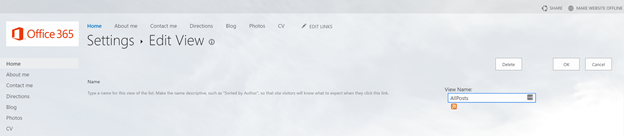
Go back to your post Lists and select your new list like “AllPosts” and then select to Modify this View
-
In the Edit View Select the Icon of RSS
Note: When you view the RSS it could take along because the number of Items that you could have
- Right Click on the page and select “Save As..” and save you file like AllPosts.xml
After all this steps now we are going to create the Solution on Azure
2 – Create the Solution
This section will show how to deploy the solution of Wodpress on Azure
After some research I have decided to create a Solution of WordPress on Azure using a SQL Database using Project Nami. http://projectnami.org/
 +
+ 
You can read more about this solution at – http://projectnami.org/how-did-we-get-here/
And of course the Team – http://projectnami.org/the-team/
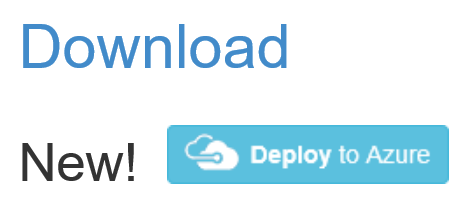
- Go to the Download page – http://projectnami.org/download/
-
Select “Deploy to Azure
Note: You can see a Video How to Deploy here – http://projectnami.org/video-deploying-project-nami/
- It will redirect to Azure Portal and ask your login
-
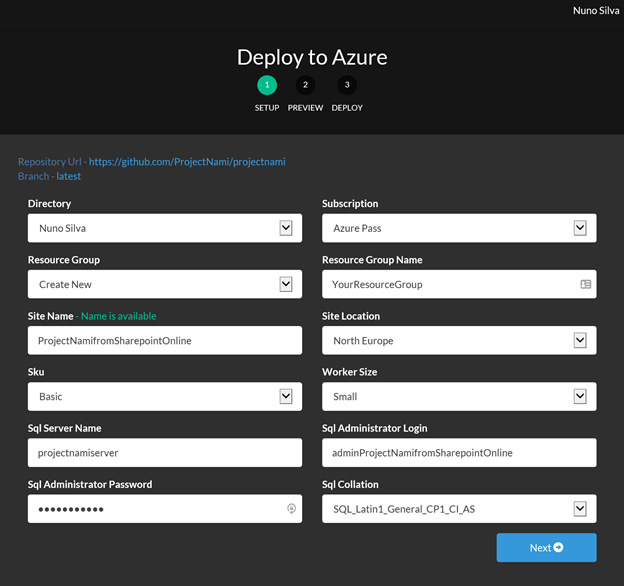
After you have logon it will show just 3 steps (Setup, Preview and Deploy)

-
Fill with your data and select Next
-
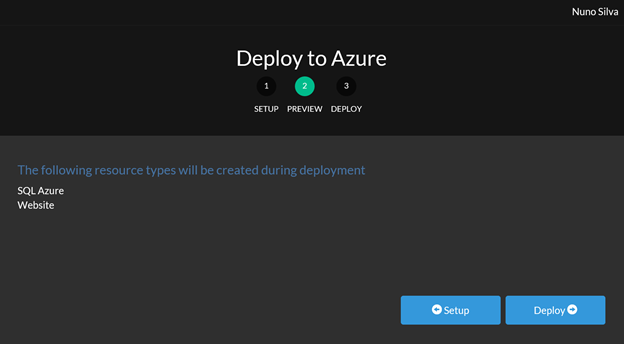
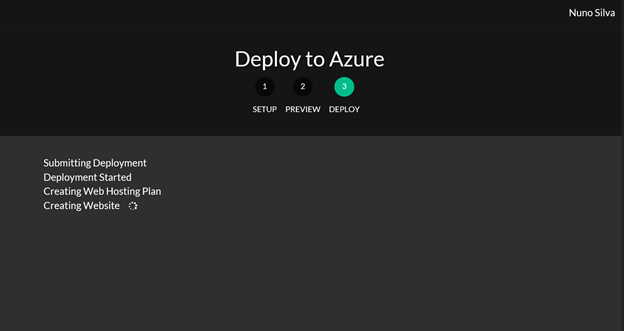
Review the resources that will be created on Azure and select Deploy
-
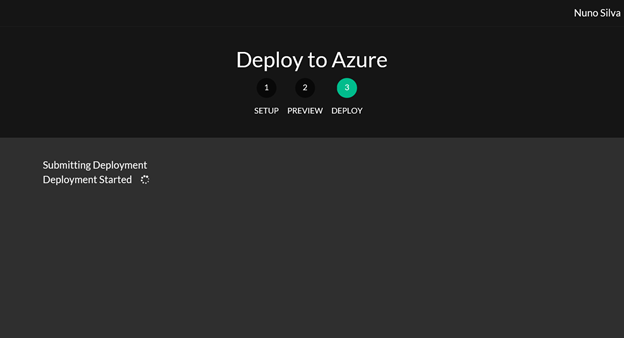
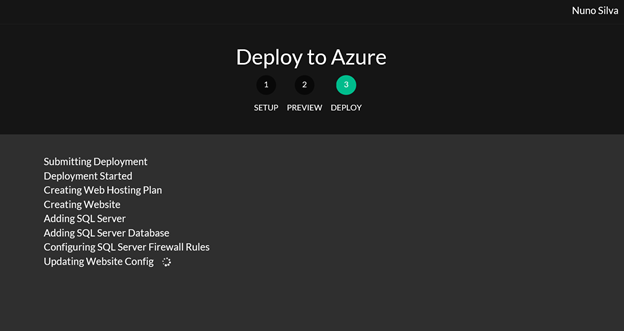
Just wait some minutes to be the Solution Deployed to Azure
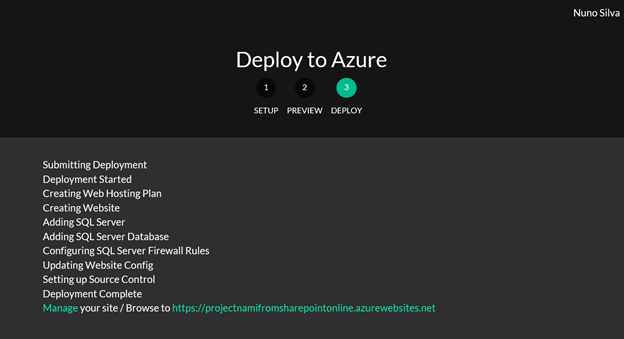
- After Deploy has completed, click on Manage or Browse your site
-
If you click Browse you can see your web application on Azure
-
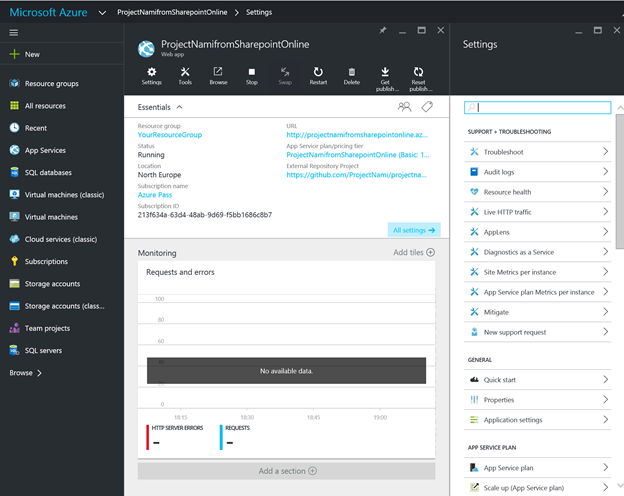
You can view also your Recourse Group that have all your resources from the Deployment
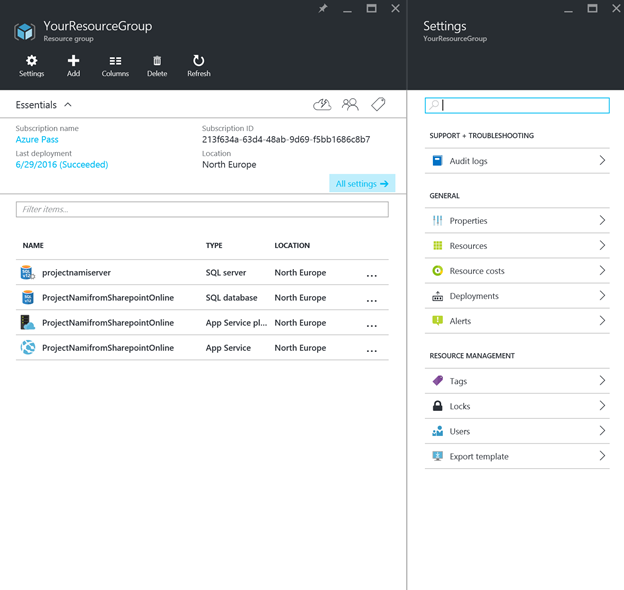
Alfter all this steps you have deployed the solution on Azure
3 – Configure WordPress
This section will show how to configure base WordPress
-
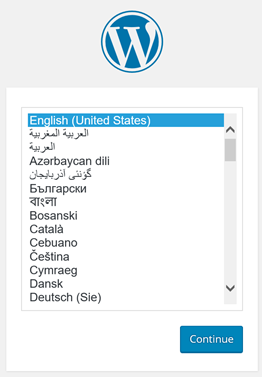
When you click to Browse your site for the first time you have to follow the first screen to choose the Language. Select your preferred Language an Click “Continue”
-
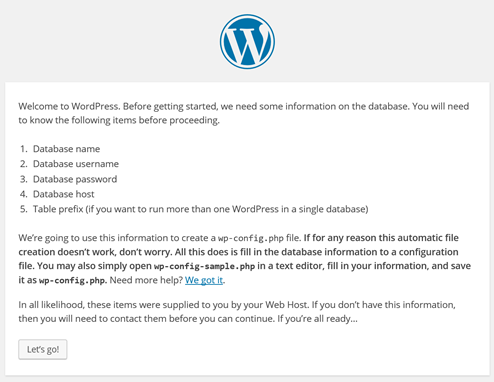
Next will appear the Welcome Screen, click “Let’s go!”
-
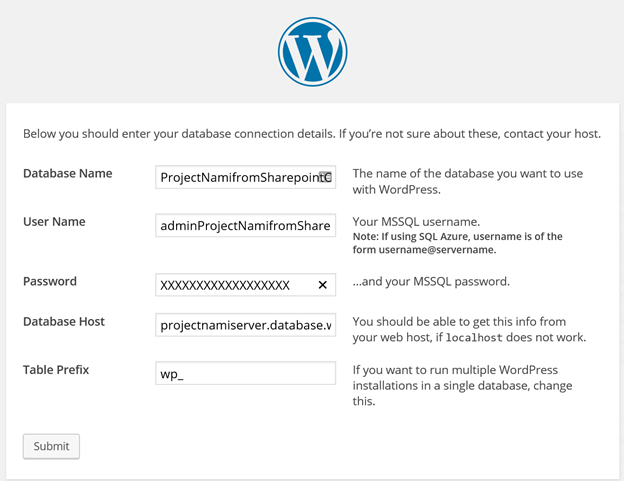
Confirm the Details that you have created before when you deploy the Solution of Project Nami and click “Submit”
-
After this click on “Run the install”

-
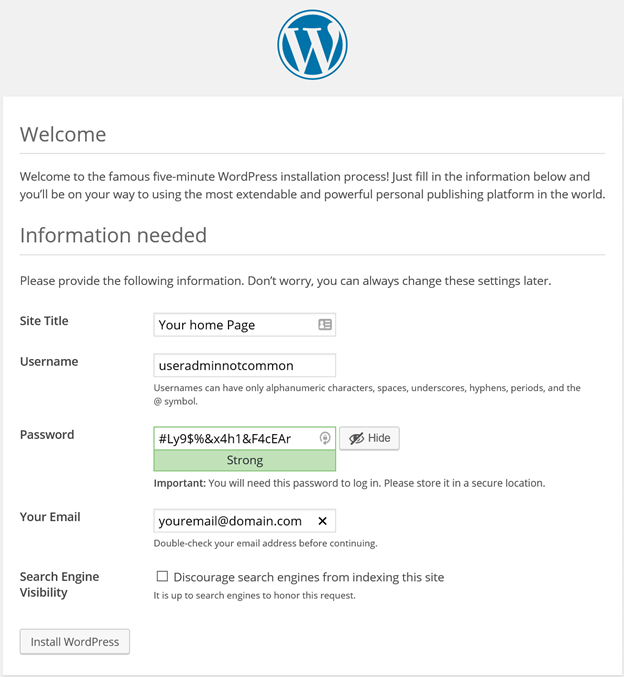
On the Welcome page, chose your Site Title, Username, Password, Your email and click “Install WordPress”
-
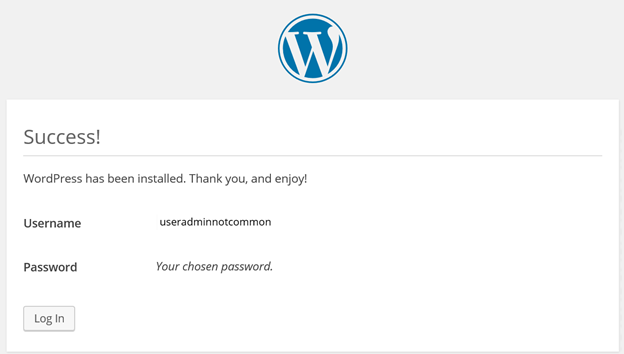
After the installation review the Success information and click “Login”
-
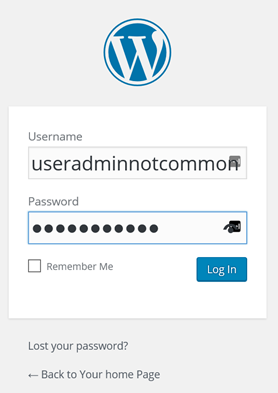
Enter your credentials and press “Log In”
-
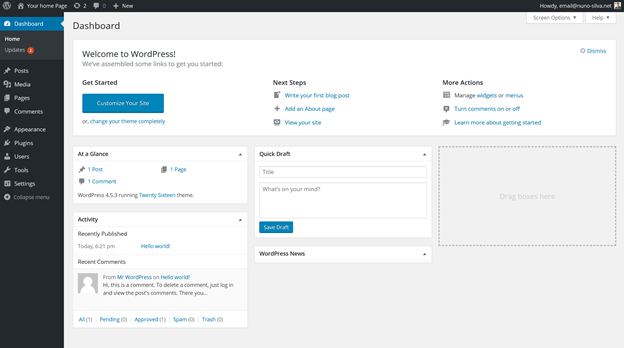
After you logged in you go to Dashboard of WordPress
-
Simply go to Updates and select “Select All” and press “Update Themes” to update your base WordPress
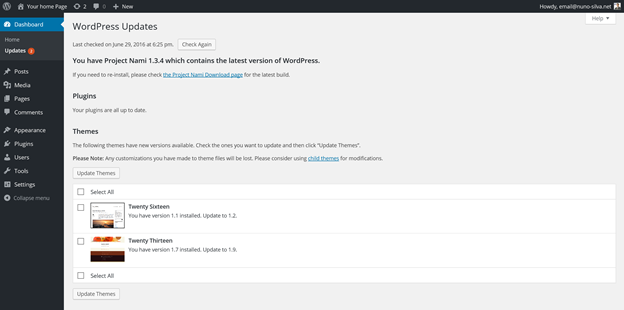
-
After successfully update the themes you see the result like below
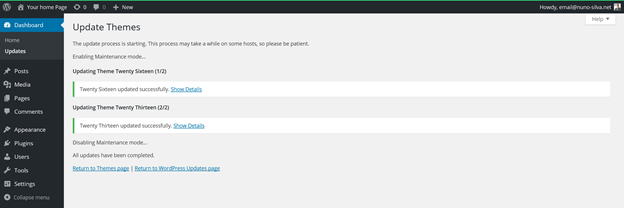
-
Now click on “Your Home Page” to see how it likes the base WordPress
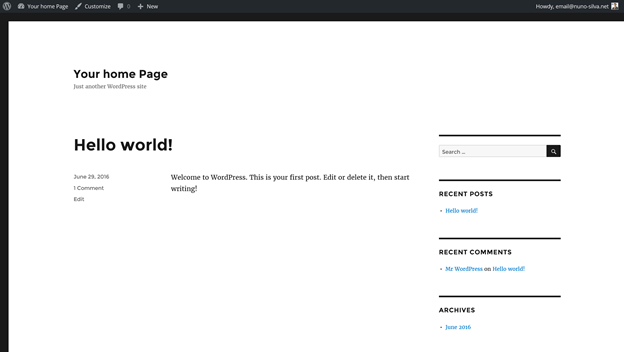
After this you are set to first import your blog posts
4 – Import Blog Posts
This sections will show how to import your blog post from the XML exported from RSS of Sharepoint
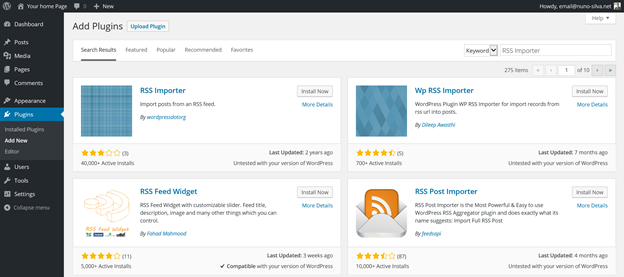
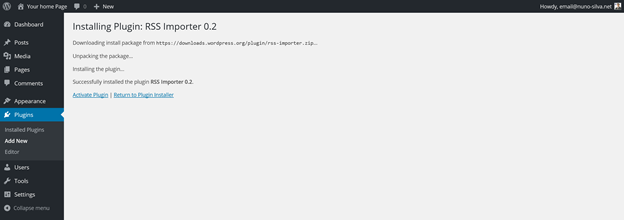
1. Now go to Plugins and Search for “RSS Importer” and select the First on the image (RSS Importer by wordpressdotorg) and click “Install Now”
2. Now you will see the results of the installation of the Plugin RSS Importer 0.2 and Click “Activate Plugin”
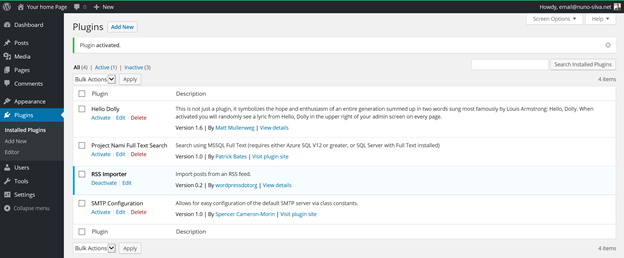
3. Then after you have the Plugin activated below of the Plugin it will show the word “Deactivate”, that tells you that the plugin is activated
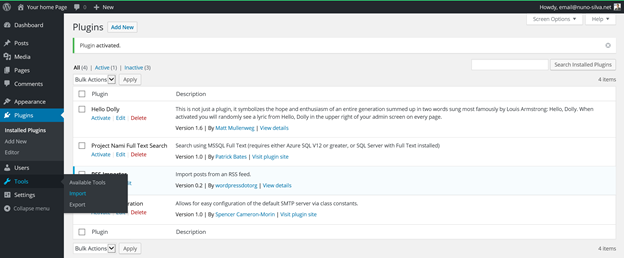
4. Now go to Tools, and click “Import”
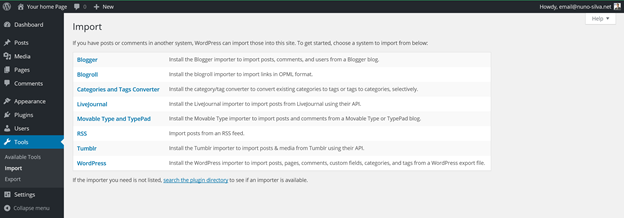
5. On the Import page click on “RSS”
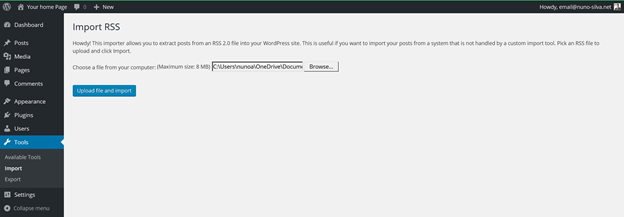
6. On the Import RSS page chose the XML file that you have exported from Sharepoint and click “Upload file and import”
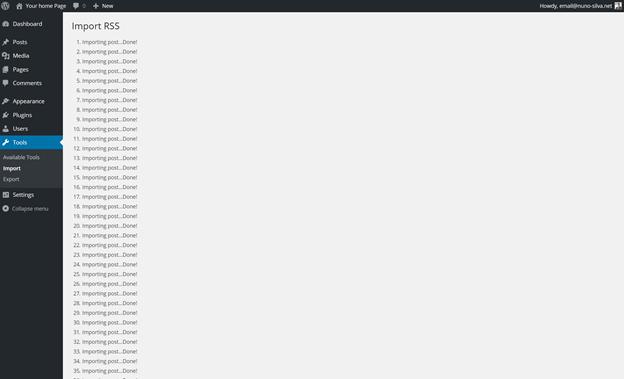
7. Now you will see the progress of Import posts
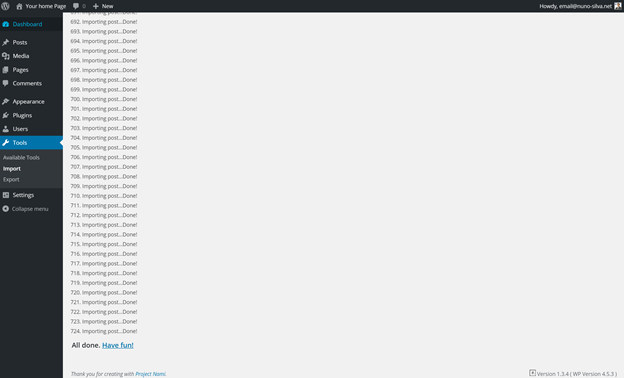
After this your import process is done
Conclusion
With this process and this solution, you can now migrate your Sharepoint Online Public Website to WordPress on Azure with SQL Database and customize the WordPress as you would like, using the Plugins that you like and need to your site.
After all take care that you will need to migrate all content, just rearrange the page as you like and then just publish it.
Note: This site was migrated using this process and migrated from Sharepoint Online Public Website to WordPress on Azure with SQL Database
[…] MIGRATE SHAREPOINT PUBLIC WEBSITE TO WORDPRESS ON AZURE WITH SQL http://www.nuno-silva.net/blog/post/10723/migrate-sharepoint-public-website-to-wordpress-on-azure-wi… […]
[…] MIGRATE SHAREPOINT PUBLIC WEBSITE TO WORDPRESS ON AZURE WITH SQL http://www.nuno-silva.net/blog/post/10723/migrate-sharepoint-public-website-to-wordpress-on-azure-wi… […]
[…] MIGRATE SHAREPOINT PUBLIC WEBSITE TO WORDPRESS ON AZURE WITH SQL http://www.nuno-silva.net/blog/post/10723/migrate-sharepoint-public-website-to-wordpress-on-azure-wi… […]
[…] MIGRATE SHAREPOINT PUBLIC WEBSITE TO WORDPRESS ON AZURE WITH SQL http://www.nuno-silva.net/blog/post/10723/migrate-sharepoint-public-website-to-wordpress-on-azure-wi… […]