Body:
In case you missed it, Azure has a very cool new feature called Azure multifactor authentication, using MFA in Azure you can perform multifactor for Azure apps and for on-premise apps as well.
In this blog, we will see how to configure Azure Cloud MFA with Exchange 2013 SP1 on premise, this will be a long blog with multiple steps done at multiple levels, so I suggest to you to pay a very close attention to the details because it will be tricky to troubleshoot the config later.
here are the highlevel steps:
- Configure Azure AD
- Configure Directory Sync.
- Configure multifactor Authentication Providers.
- Install/Configure MFA Agent on the Exchange server.
- Configure OWA to use basic authentication.
- Sync Users into MFA agent.
- Configure users from the desired login type.
- Enroll users and test the config.
so let us RNR:
Setting up Azure AD/MFA:
Setting up Azure AD/MFA is done by visiting https://manage.windowsazure.com , here you have 2 options (I will list them because I had them both and it took me a while to figure it out):
- If you have never tried azure, you can sign up for a new account and start the configuration.
- If you have Office 365 enterprise subscription, then you will get Azure AD configured, so you can sign in into Azure using the same account in Office 365 and you will find Azure AD configured for you (I had this option so I had to remove SSO from the previous account and setting it up again).
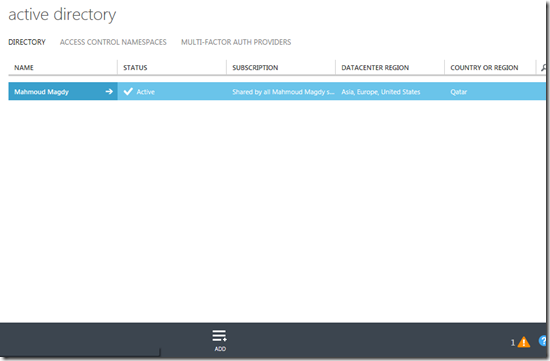
Once you login to the portal, you can setup Azure AD by clicking add:
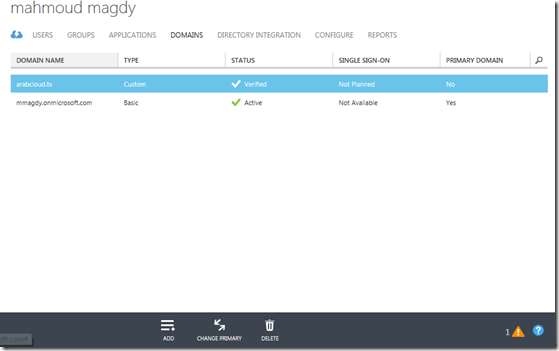
Since I had Office 365 subscription, It was already configured, so if you click on the directory, you can find list of domains configured in this directory:
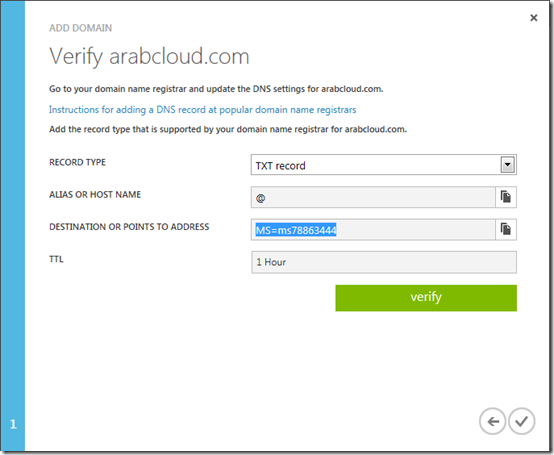
If you will add a new domain, click on add and add the desired domain, you will need to verify the domain by adding TXT or MX record to prove you domain ownership, once done you will find the domain verified and you can configure it, the following screenshots illustrates the verification process:
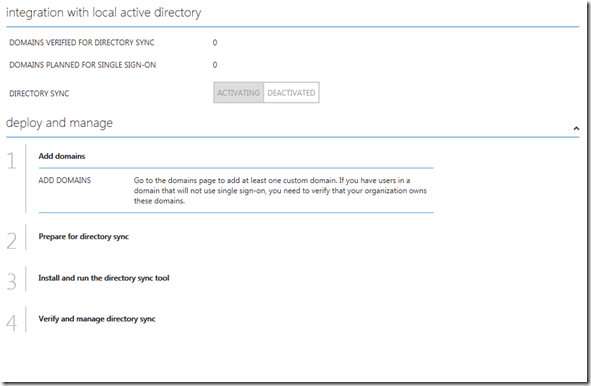
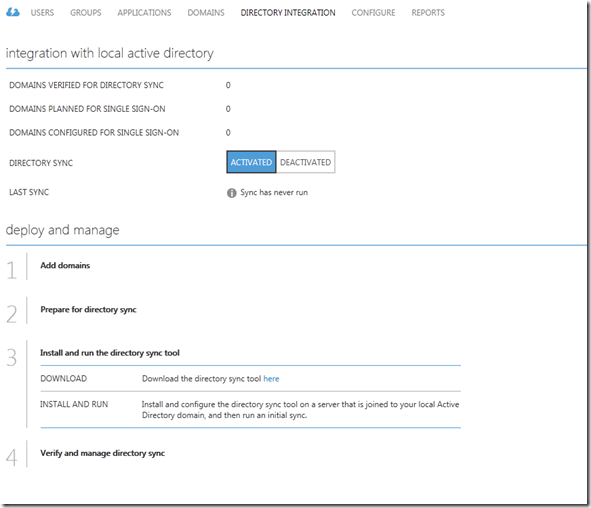
Once done, go to Directory Integration and choose to activate directory integration:
One enabled, download the dirsync tool on a computer joined to the domain:
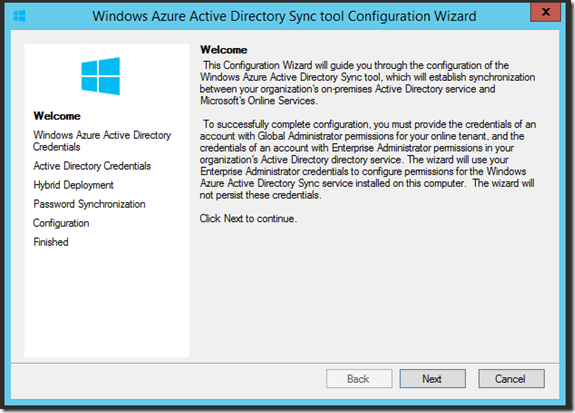
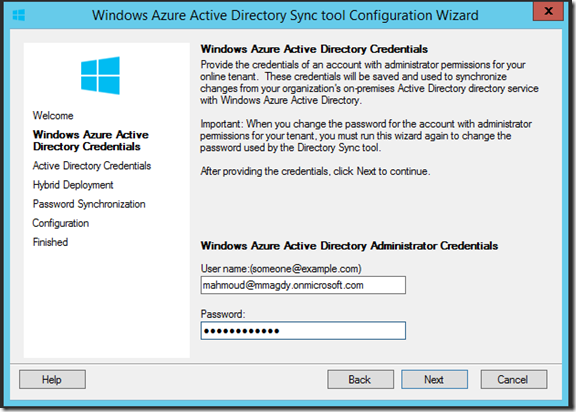
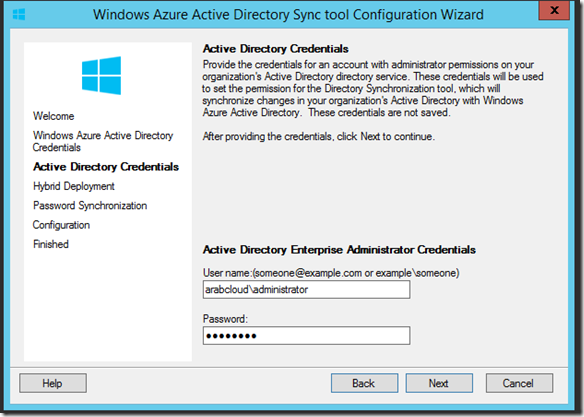
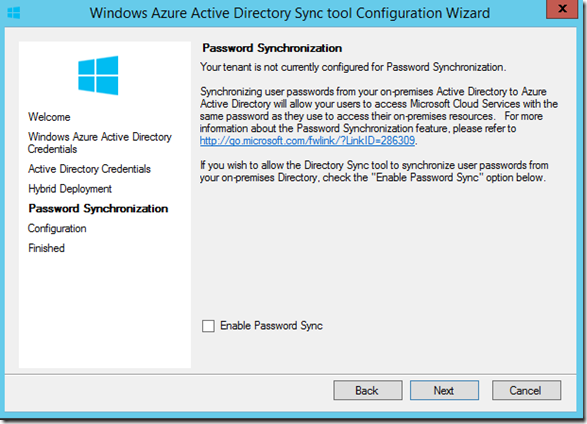
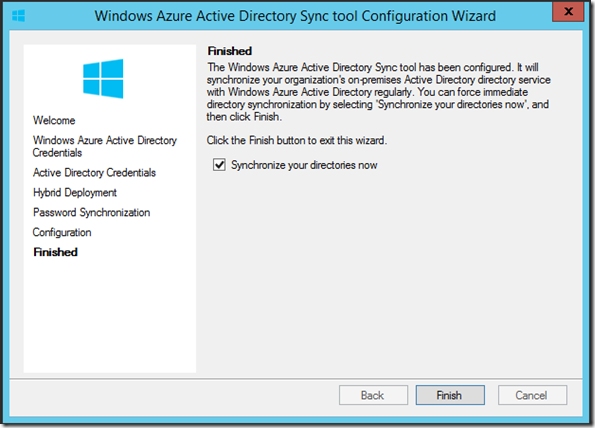
Once installed, you will run through the configuration wizard which will ask you about the azure account and the domain admin account to configure the AD Sync:
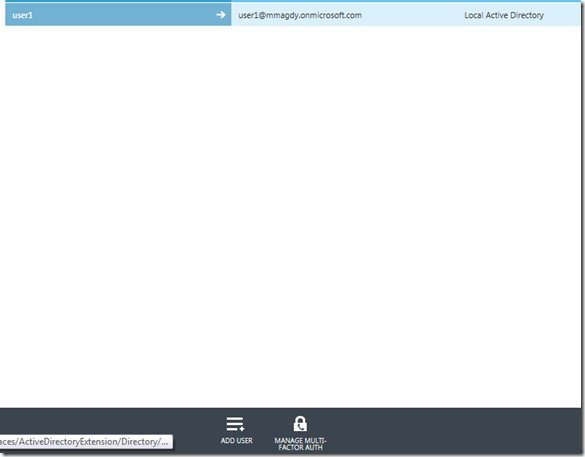
Once done, you can check the users tab in Azure AD to make sure that users are sync’d to Azure successfully:
If you select a user, you can choose to Manage Multifactor Authentication
you will be prompt to add a multifactor authentication provider, the provider essentially controls the licensing terms for each directory because you have per user or per authentication payment, once selected you can click on manage to manage it:
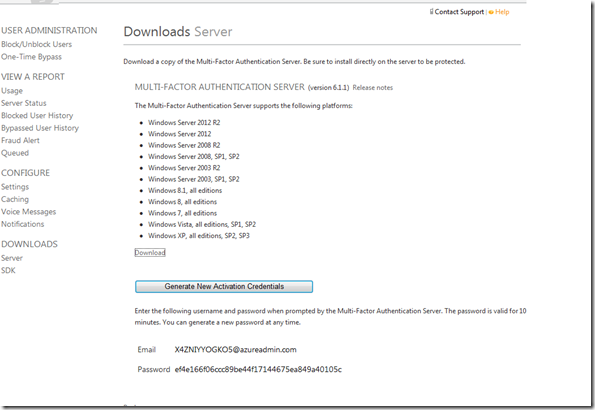
Once you click manage, you will be taken to the phonefactor website to download the MFA agent:
click on downloads to download the MFA agent, you will install this agent on:
- A server that will act as MFA agent and provides RADIUS or windows authentication from other clients or
- Install the agent on the Exchange server that will do the authentication (frontend servers).
Since we will use Exchange, you will need to install this agent on the Exchange server, once install you will need to activate the server using the email and password you acquired from the portal:
Once the agent installed, it is time to configure the MFA Agent.
Note: the auto configuration wizard won’t work, so skip it and proceed with manual config.
Another note: FBA with OWA won’t work, also auto detection won’t work, so don’t waste your time.
Configuring the MFA Agent:
I need to stress on how important to follow the below steps and making sure you edit the configuration as mentioned or you will spend hours trying to troubleshoot the errors using useless error codes and logs, the logging still poor in my opinion and doesn’t provide much information for debugging.
the first step is to make sure the you have correct name space and ssl certificate in place, typically you will need users to access the portal using specific FQDN, since this FQDN will point to the Exchange server so you will need to publish the following:
- Extra directories for MFA portal, SDK and mobile app.
- or Add a new DNS record and DNS name to the ssl certificate and publish it.
In my case, I chose to use a single name for Exchange and MFA apps, I chose https://mfa.arabcloud.tv, MFA is just a name so it could be OWA, mail or anything.
SSL certificate plays a very important role, this is because the portal and mobile app speaks to SDK over SSL (you will see that later) so you will need to make sure that correct certificate in place as well as DNS records because the DNS record must be resolvable internally.
once the certificate/DNS issue is sorted, you can proceed with the install, first you will install the user portal, users will use this portal to enrol as well as configuring their MFA settings.
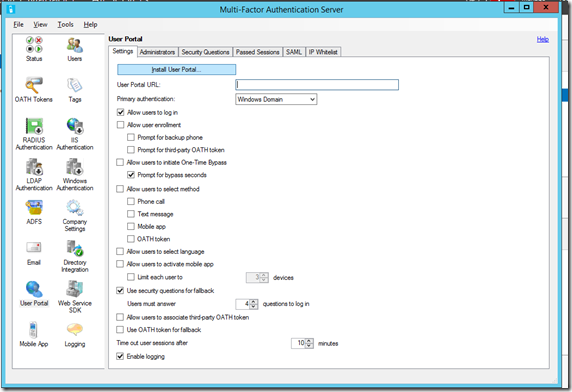
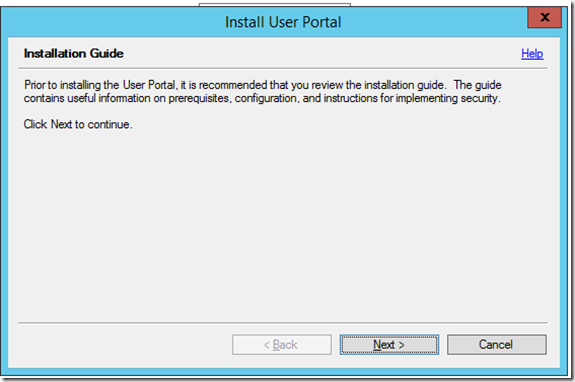
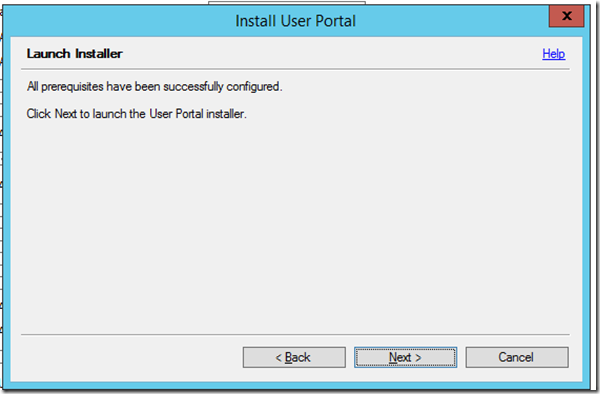
From the agent console, choose to install user portal:
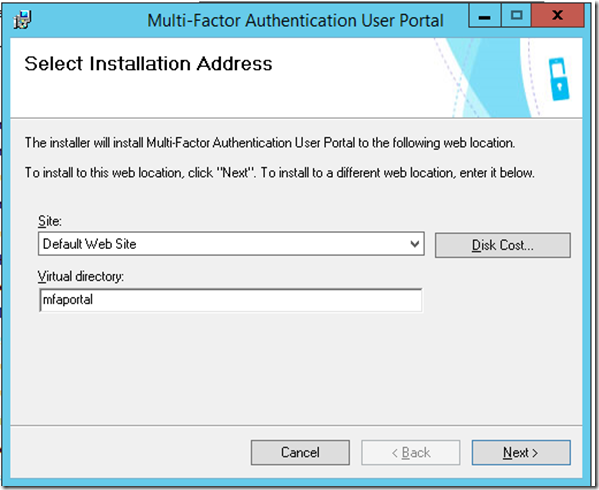
It is very important to choose the virtual directory carefully, I highly recommend changing the default names because they are very long, in my case I chose using MFAPORTAL as a virtual directory.
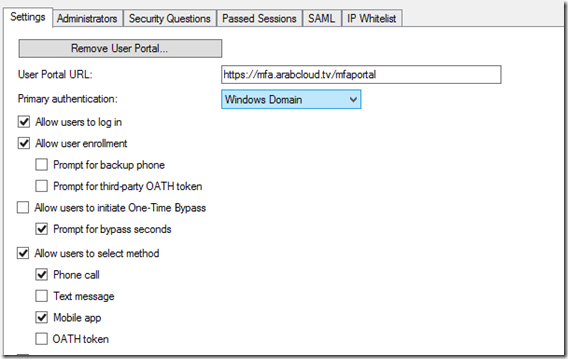
once installed, go the user portal URL and enter the URL (carefully as there is no auto detection or validation method), and make sure to enable the required options in the portal (I highly recommend enabling phone call and mobile app only unless you are in US/EU country then you can enable text messages auth as well, it didn’t work with me because the local provider in Qatar didn’t send the reply correctly).
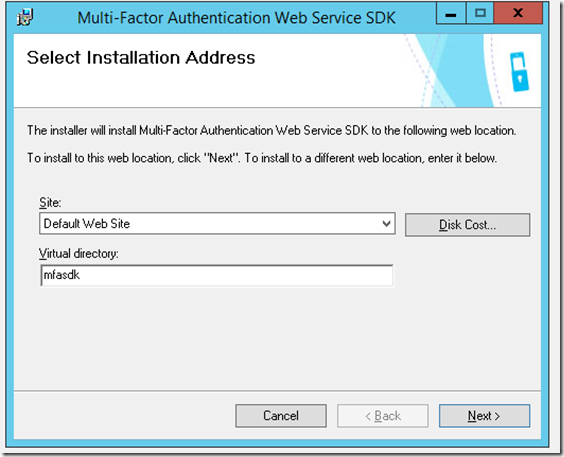
Once done, Proceed with SDK installation, again, I highly recommend changing the name, I chose MFASDK
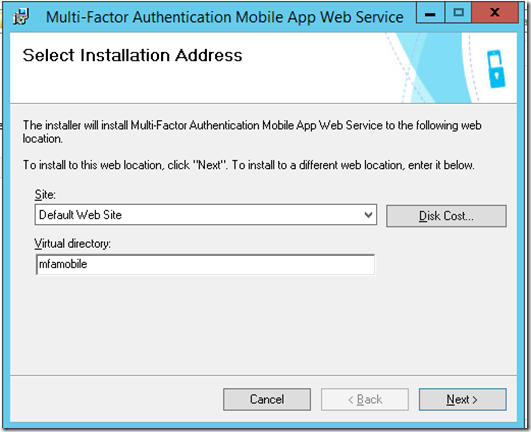
Once installed, you are ready to proceed with the third step, installing the mobile app portal, to do this browse to the MFA agent installation directory, and click on the mobile app installation, also choose a short name, I chose MFAMobile
Once Installed, you will have to do some manual configuration in the web.config files for the portal and the mobile app.
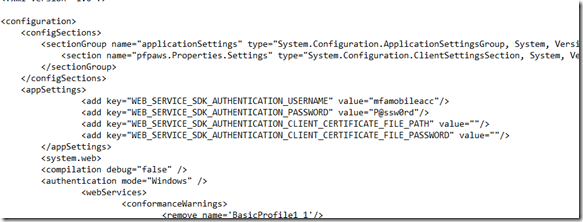
You will have to specify SDK authentication account and SDK service URL, this configuration is a MUST and not optional.
to do so, first make sure to create a service account, the best way to do it is to fire you active directory users and computers management console, find PFUP_MFAEXCHANGE account and clone it.
Once cloned, open c:intepubwwwroot
For MFA portal:
For MFA mobile App:
Once done, you will need to configure the MFA agent to do authentication for IIS.
Configure MFA to do authentication from IIS:
To configure MFA agent to kick for OWA, you will need to configure OWA to do basic authentication, I searched on how to do FBA with MFA, but I didn’t find any clues (if you have let me know).
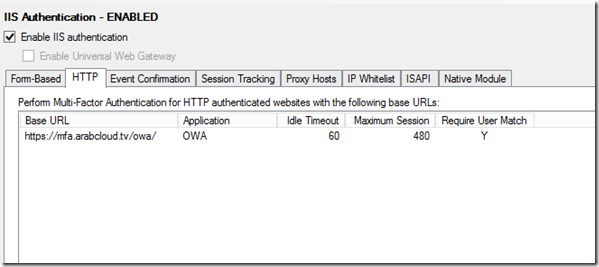
Once you configured OWA/ECP virtual directories to do basic authentication, go to the MFA agent , from there go to IIS Authentication , HTTP tab, and add the OWA URL:
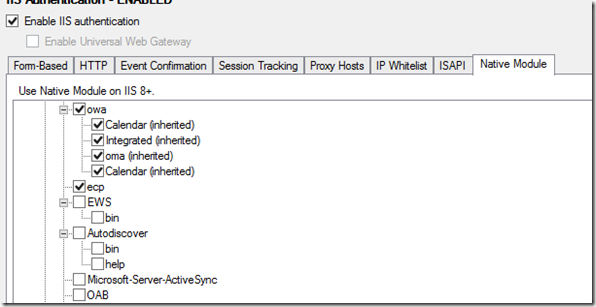
Go to Native Module tab, and select the virtual directories where you want MFA agent to do MFA authentication (make sure to configure it on the front end virtual directories only):
Once done….you still have one final step which is importing and enrolling users…
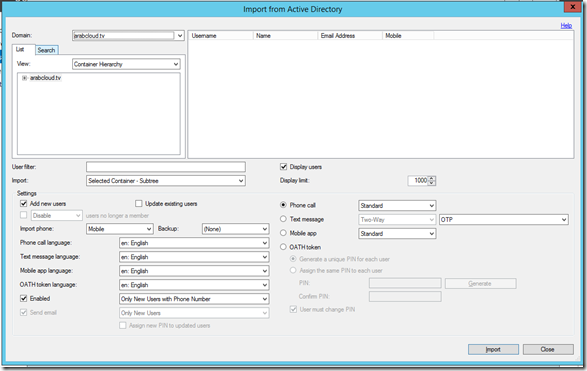
to import users, go to users, select import and import them from the local AD, you can configure the sync to run periodically:
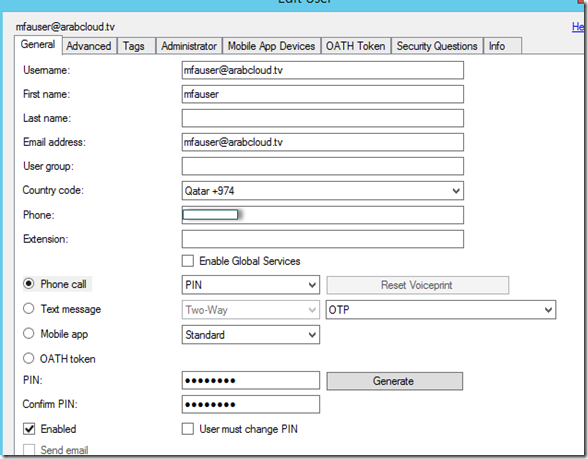
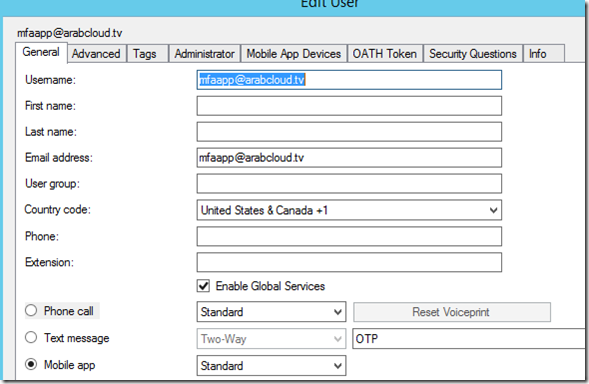
Once imported, you will see your users, you can configure your users with the required properties and settings to do specific MFA type, for example to enable phone call MFA, you will need to have the users with the proper phone and extension ( if necessary):
You can also configure a user to do phone app auth:
Once all set, finally, you can enrol users.
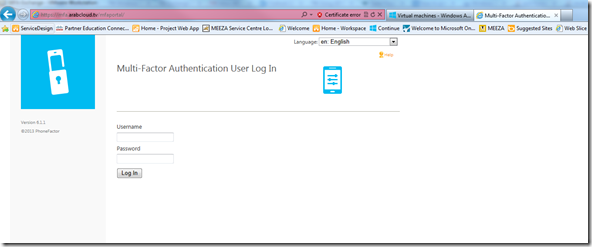
Users can enrol by visiting the user portal URL and signing with their username/password, once signed they will be taken to the enrolment process.
for phone call MFA, they will receive a call asking for their initial PIN created during their configuration in MFA, once entered correctly, they will be prompted to enter a new one, once validated the call will end.
in subsequent logins, they will receive a call asking them to enter their PIN, once validated successfully, the login will be successful and they will be taken into their mailbox.
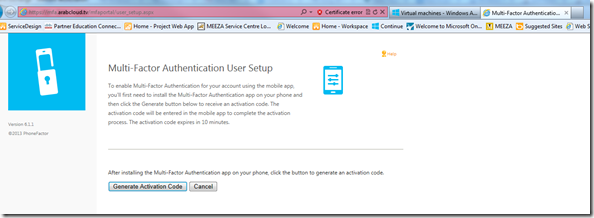
in mobile app, which will see here, they will need to install a mobile app on their phones, once they login they can scan the QR code or enter the URL/Code in the app:
Once validated in the app, you will see a screen similar to this:
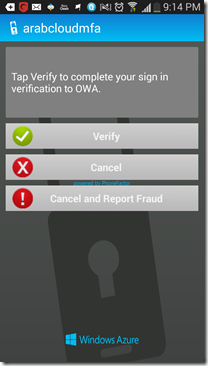
Next time when you attempt to login to OWA, the application will ask you to validate the login:
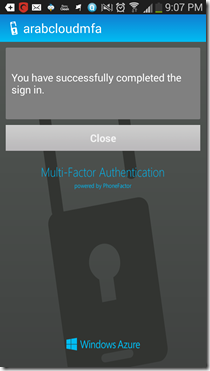
Once authentication is successful, you will see:
and you will be taken to OWA.
Final notes:
again, this is the first look, I think there are more to do, like RADIUS and Windows authentication which is very interesting, also we can configure FBA by publishing OWA via a firewall or a proxy that does RADIUS authentication + FBA which will work.
I hope that this guide was helpful for you.
